Alien Skin is well known as the manufacturer of some of the best plugins for Photoshop and ‘Photoshop-compatible’ applications. These include a range of ‘Eye Candy’ plugins which can be used to change or mutate your images by adding shadows, textures, bevels, ‘glass’ and ‘metal’ effects.
Not all Alien Skin plugins aim to be quite so eye-catching, however. Alien Skin also has a couple of image processing plugins aimed at enhancing photographs in such a way that the viewer probably wouldn’t suspect that any image processing had been done at all. I’ve previously written about Blow Up which helps to enlarge images with the minimum degradation in quality. More recently, Alien Skin launched Bokeh, a plugin that helps to simulate depth of field in photographs - in effect, transforming a fairly ‘flat’ picture in which both the foreground and the background are sharply focussed into one in which selective elements are ‘defocused’ so that, for example, a person in the foreground is sharply focused against a blurry background.
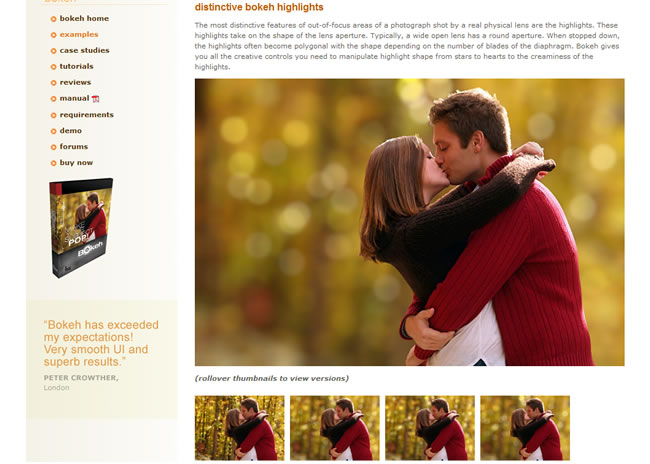
Examples of Bokeh effects on the Alien Skin web site
It may sound like a bizarre idea: deliberately blurring a sharply focused photograph. There are two main reasons why you would want to do this. Either you may decide that, for purely artistic reasons, you want to draw the viewer’s eye to one part of the image, so that’s the part you want most sharply focussed; or you may want to simulate the focusing effect of a certain type of camera lens. Now, I have to admit that I am not a camera lens expert and I wouldn’t be able to tell a photograph taken with a Canon EF 85mm f/1.2L II from another taken with a Micro-Nikkor 105mm f/2.8. However, the chaps at Alien Skin seem to know all about these things and can often be heard waxing lyrical about the ‘smooth and creamy’ qualities of one lens or the other. And they reckon that even if you take your pictures without one of those mighty lenses you can add very similar smooth and creamy qualities to the resultant images by giving them a Bokeh makeover in Photoshop or Fireworks.
While Bokeh generally aims to create ‘natural looking’ images, it also helps you to change the original photograph in subtle and deceptive ways. For example, if the original photograph includes buildings or trees all at one level in the background, you can selectively defocus some of these to make it seem that they are at varying distances. So if the camera didn’t lie, Bokeh will! It can even add lens effects such as defocused ‘twinkles’ apparently reflected on water or background objects.
Using Bokeh is pretty straightforward. You just pop up an editing dialog and select from a list the lens or vignette effect that you want to apply. Then, on another page of the dialog, you can tailor the Bokeh effect by adding a radial or planar selection - that is, an elliptical or linear selector that determines the ‘fade in’ and ‘fade out’ limits of the blurring effect. Alternatively, you can select one or more regions of the image in the main application (such as Photoshop or Fireworks) and then use Bokeh to apply effects only to those selections.
Bokeh is not a plugin for people who want ‘sock-’em-in-the-eye’ effects. But if you are a serious photographer and you need to add realistic lens effects to existing images, Bokeh is a great tool to have.
Bokeh Walkthrough
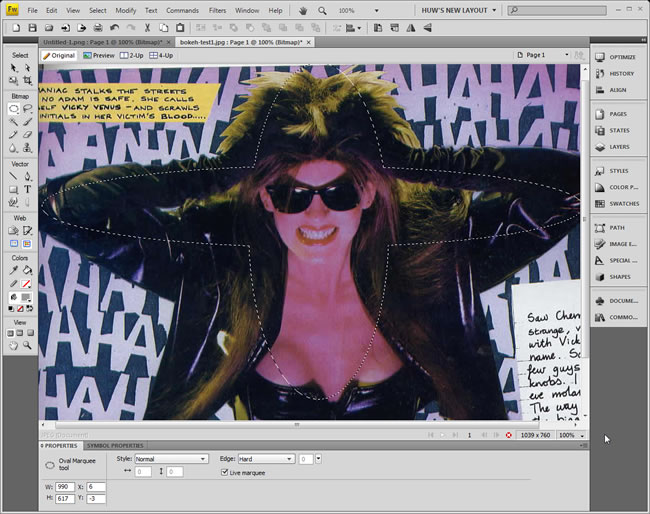
Below is an example showing how to use Bokeh. Here I am using an actual photograph/cartoon montage from a photo story in a magazine which I used to publish. As you can see, the image starts off pretty ‘flat’ - both the girl in the foreground and the letters (the ‘Ha-ha!’ characters) in the background are equally ‘in focus’. I’ve loaded the image into Fireworks and I have drawn two overlapping ovals to mark out a selected area....
Now I load up Bokeh and I select a lens effect from a list of presets. Immediately the background characters go out of focus while the girl inside my selection remains focused...
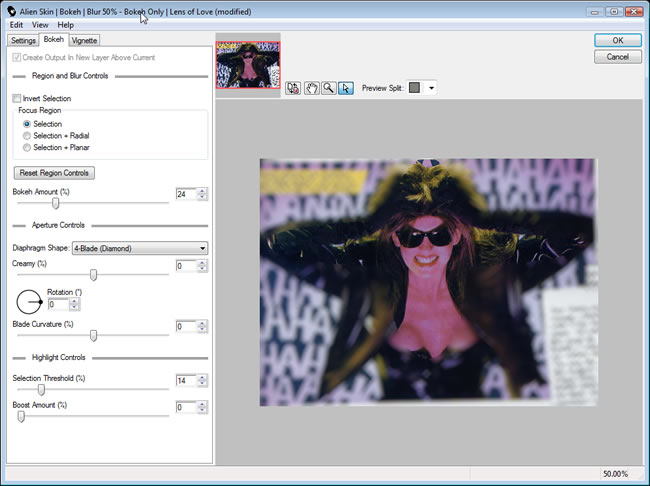
A click of a mouse and I can reverse this effect, by putting the selected area out of focus and the unselected area in focus. Here I have used a divided preview so that I can compare my Bokeh-processed version (on the left) with the original image (on the) the right....
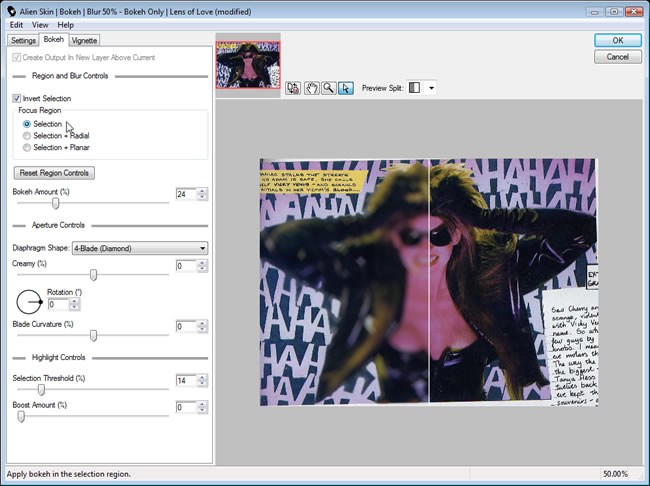
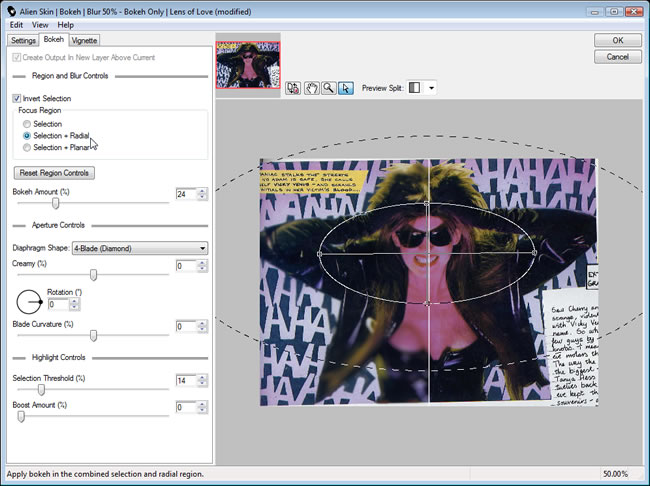
Finally, I switch back to focussing in on the girl and blurring the background. This time, however, I have toned down the blurring. I have also added a radial selection to focus on the girl’s face and apply a subtle radial blurring...